Hey fellow traders! If you’re looking to step up your trading game, let’s talk about the Tipu MACD E...
Hey fellow traders! I’m excited to share that I’ve been working on a new trading panel designed to m...
Hey fellow traders! If you’re looking to simplify your trading experience, let me introduce you to a...
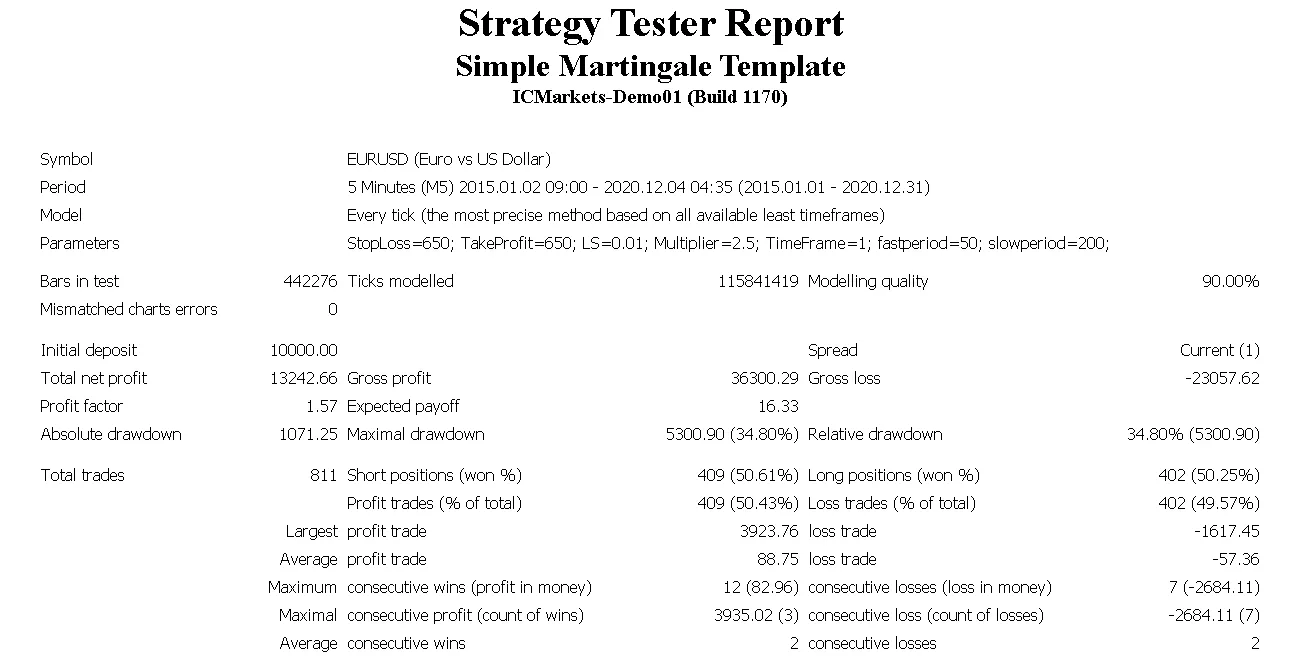
When it comes to trading, one of the first things on a trader's mind should be money management. A s...
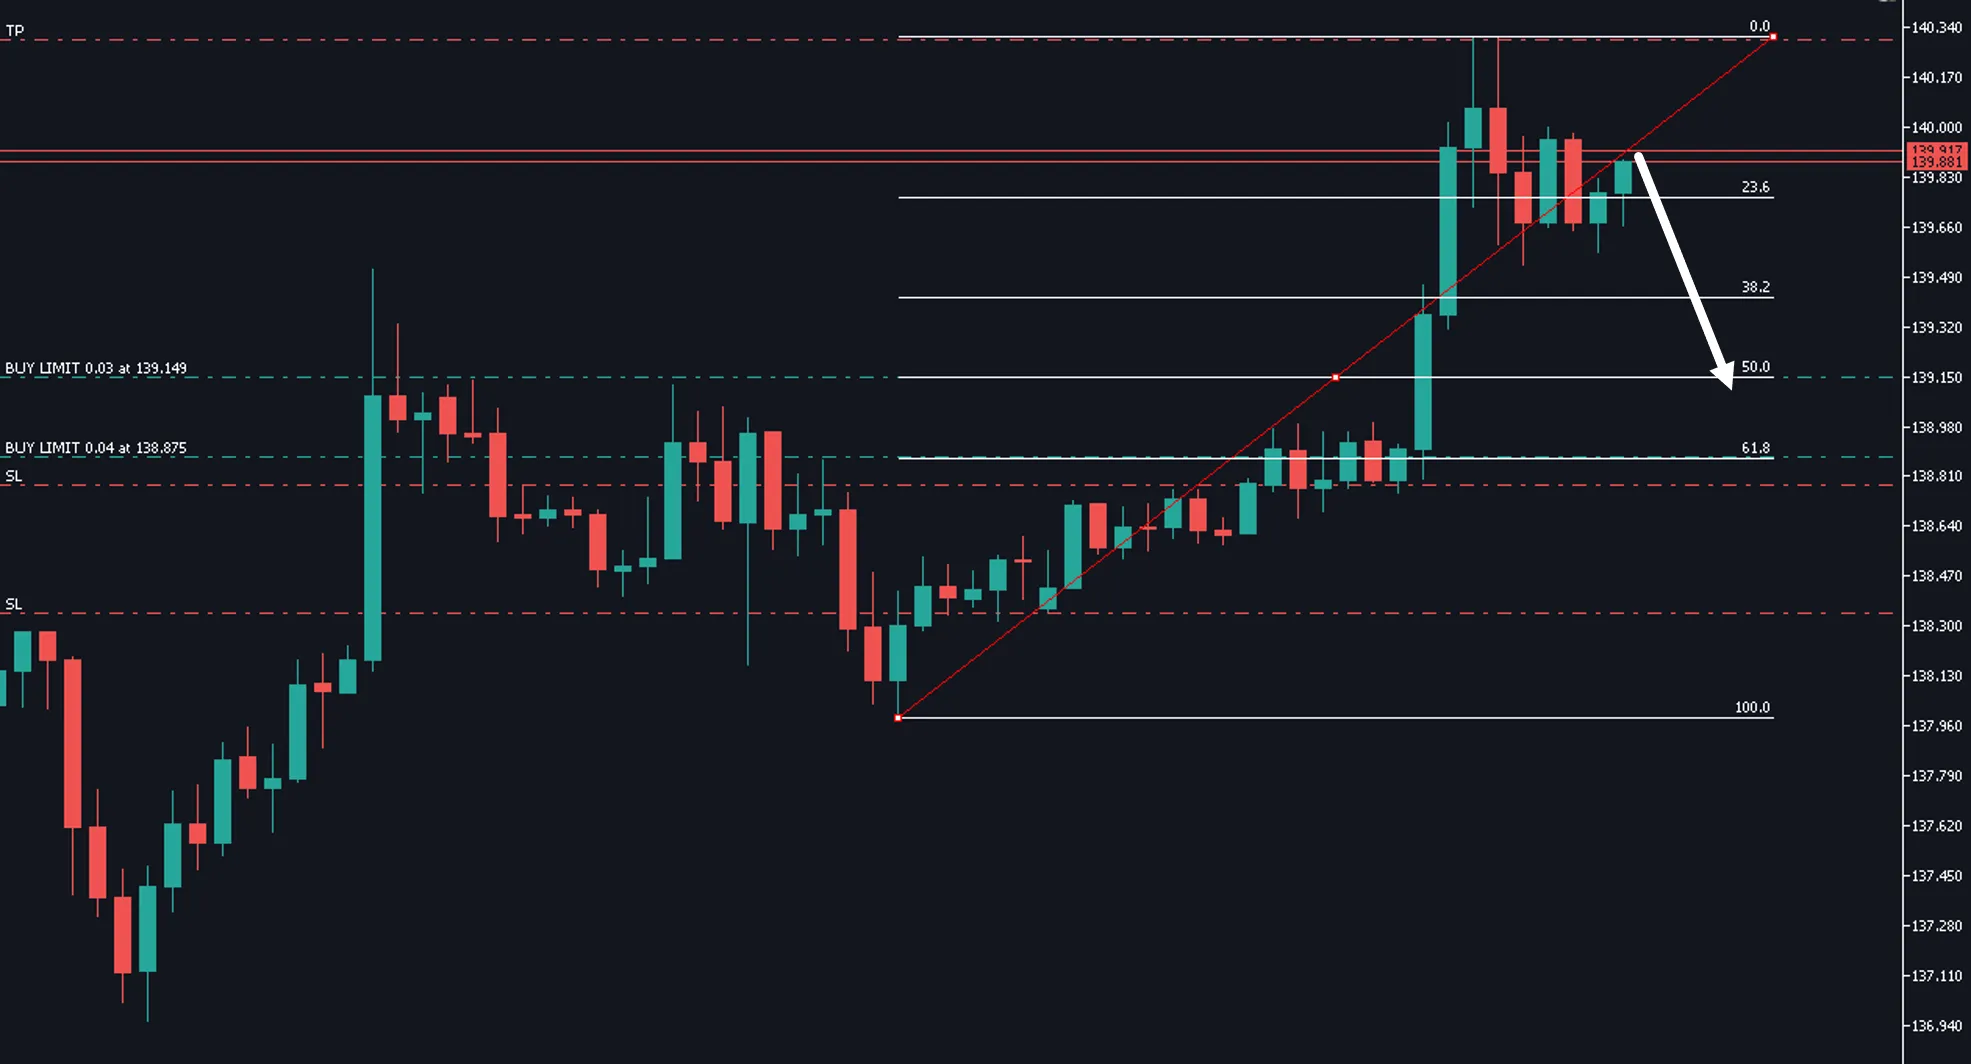
Why Scalping is a Go-To Strategy for Traders Scalping has become one of the go-to strategies for tra...
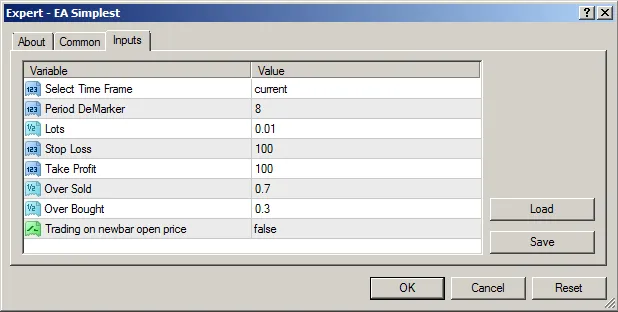
Hey fellow traders! Today, I want to dive into a handy Expert Advisor (EA) that utilizes the crossin...
When it comes to trading in the forex market, having the right tools can make all the difference. On...
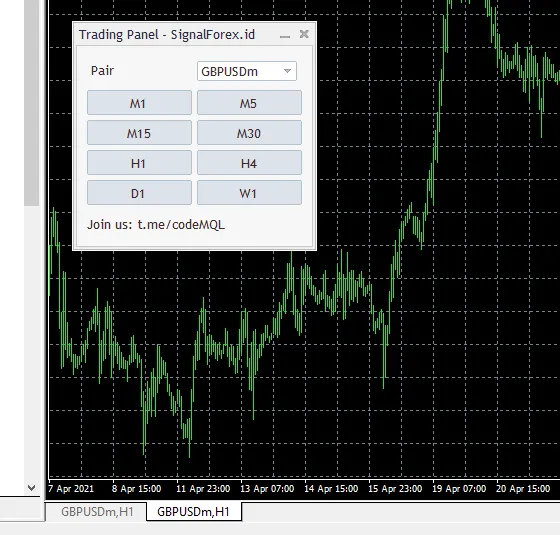
Hey fellow traders! Today, let’s dive into some nifty trading tools that can seriously streamline ho...
If you're a trader looking to take control of your trading sessions, the Auto Trading Scheduler for ...
Using the EA for Effective Trade Management Hey fellow traders! Today, we’re diving into an Expert A...
Hey traders! Let’s dive into how a trailing stop can really boost your trading game by moving the st...
In this post, we're diving into how to create an Expert Advisor (EA) that utilizes the 2 MA Crossing...
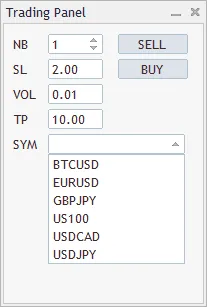
INTRODUCTION: The Simple Trading Panel is a game-changer for traders looking to streamline their ope...
Hey fellow traders! 🌟 Today, I want to share my journey developing a self-adapting Expert Advisor (E...
Welcome, fellow traders! Today, we're diving into the essentials of the MT4 EA template, focusing on...
Welcome, fellow traders! Today, we're diving into the Smart Forex System, an open version expert adv...
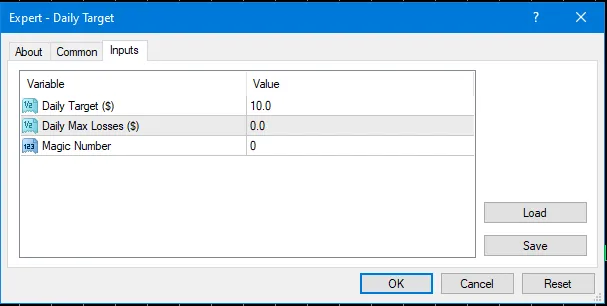
INTRODUCTION: In the world of day trading, having a solid plan is what sets professionals apart from...
Hey fellow traders! If you’ve ever considered using an Expert Advisor (EA) to enhance your trading s...
What Can This Template Do for You? If you're looking for a straightforward yet effective tool, the...
Hey there, fellow traders! I'm Lucas, and I wanted to give back to this amazing community that has t...